Google Drive Storage Configuration
CloudPaste supports Google Drive as a storage backend, implementing file operations based on Google Drive v3 API.
Supported Features
The Google Drive storage driver supports the following capabilities:
- ✅ READER: Read files and directories
- ✅ WRITER: Upload, create, rename, and delete files
- ✅ ATOMIC: Atomic operation support (batch delete, copy)
- ✅ PROXY: Proxy access
- ✅ MULTIPART: Chunked upload (resumable upload)
- ✅ PAGED_LIST: Paginated directory listing
1. Preparation
1.0 Follow OpenList Configuration Documentation (Recommended)
👉 https://doc.oplist.org/guide/drivers/google_drive
Click to expand: If created according to OpenList, please skip this step
1.1 Create a Google Cloud Project
- Visit Google Cloud Console
- Create a new project or select an existing project
- Record the project ID
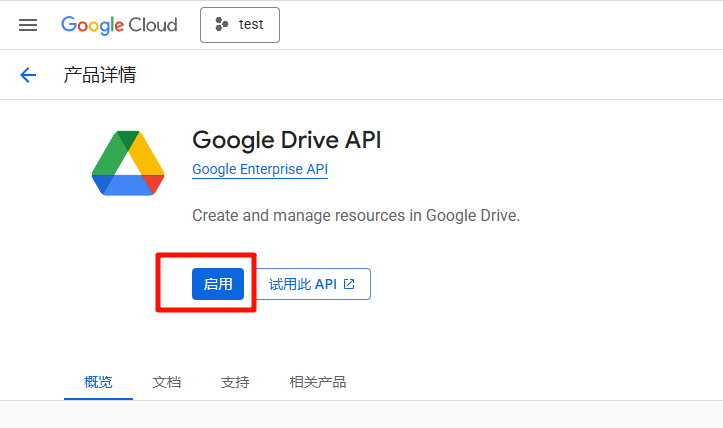
1.2 Enable Google Drive API
- Go to APIs & Services → Library
- Search for "Google Drive API"
- Click "Enable"
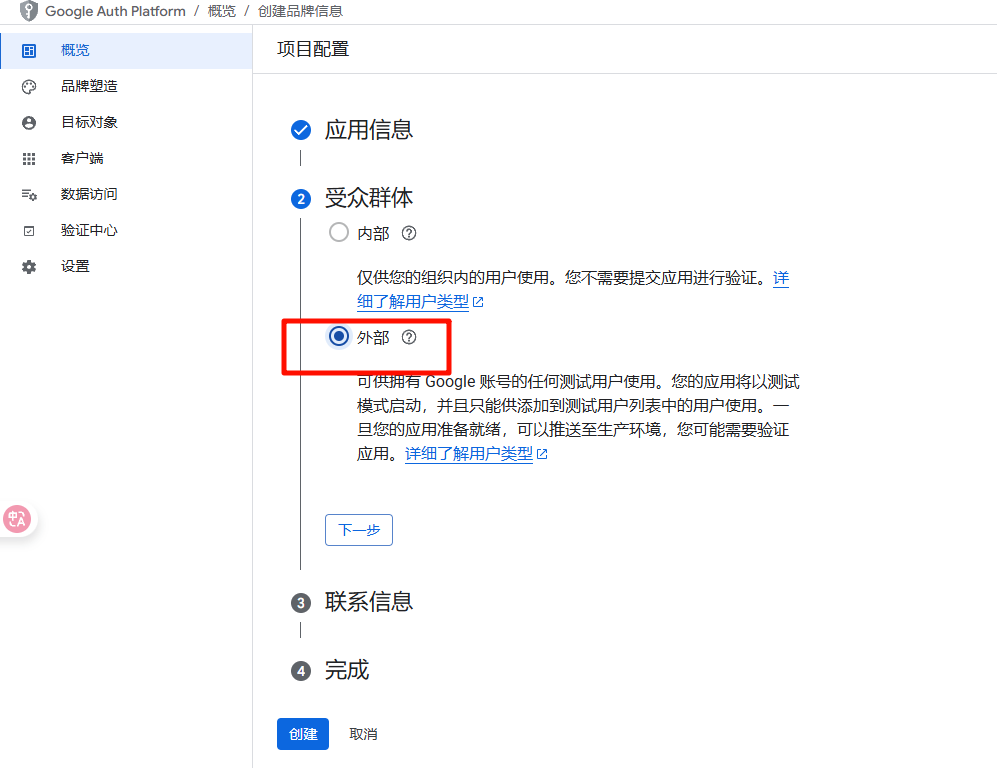
1.3 Configure OAuth Consent Screen
- Select user type (External)
- Fill in application information:
- App name: e.g.,
CloudPaste - User support email: Your email
- Developer contact information: Your email
- App name: e.g.,
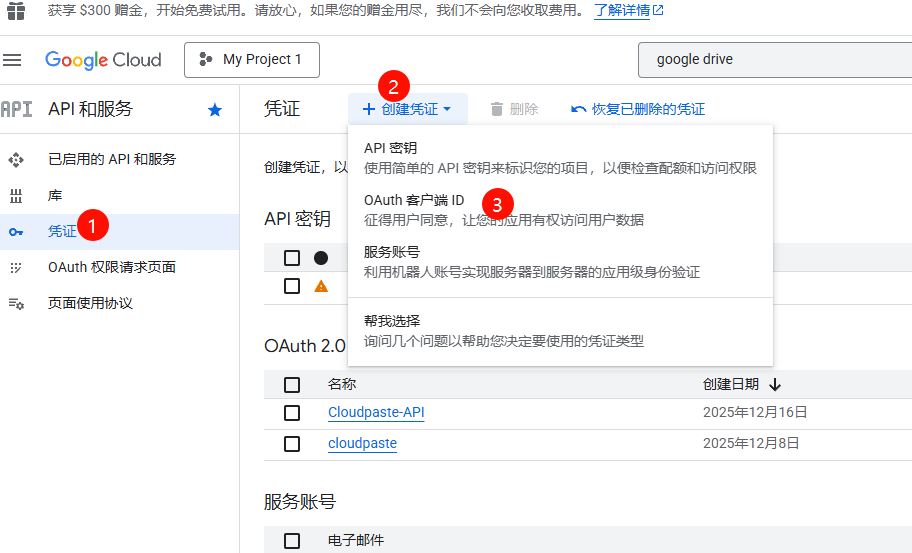
1.4 Create OAuth Credentials
- Go to APIs & Services → Credentials
- Click "Create Credentials" → Select "OAuth client ID"
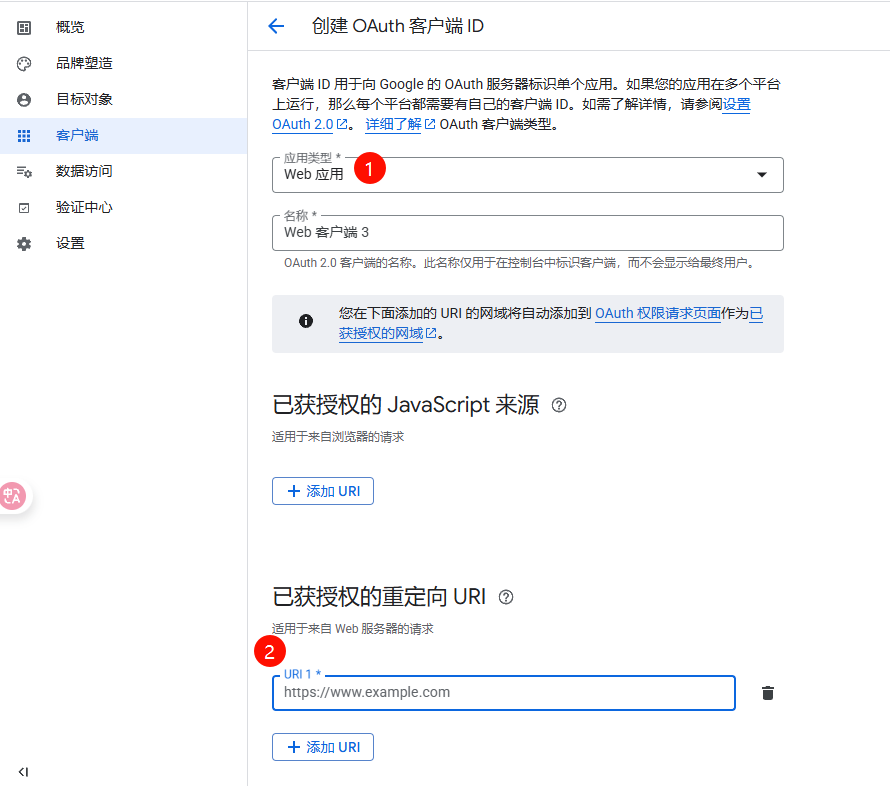
- Select "Web application" as the application type
- Fill in the name and add authorized redirect URIs (fill in the callback URL here, specifically refer to the callback address of the third-party tool)
- After creation, record:
- Client ID
- Client Secret
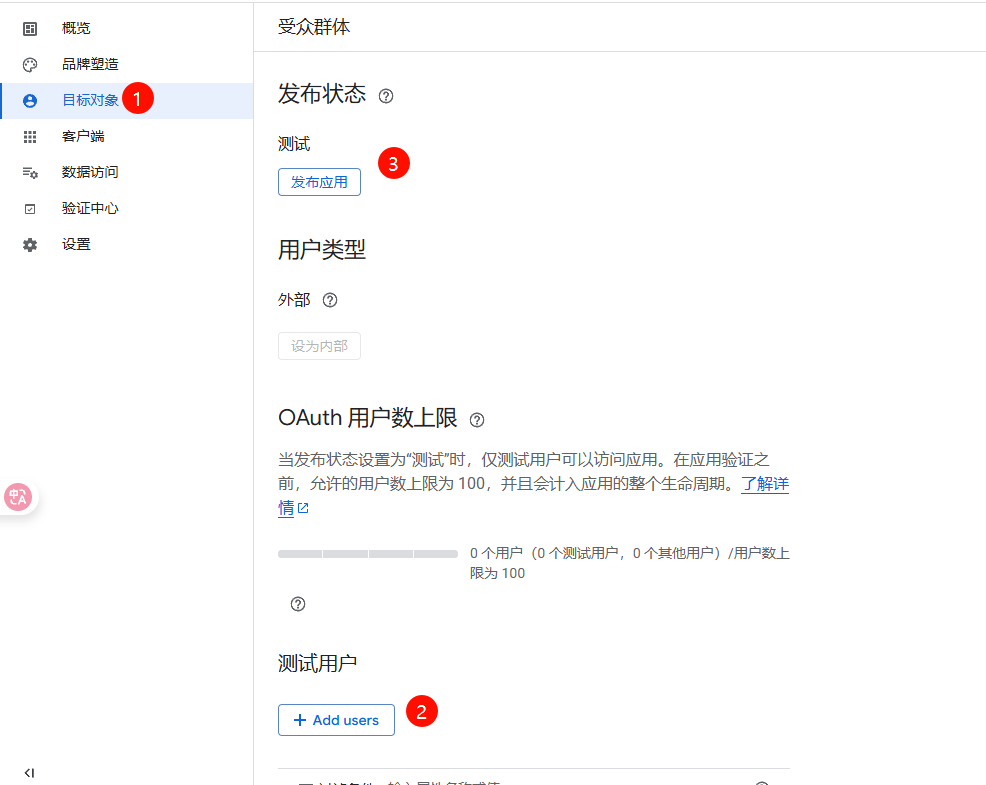
- Add yourself as a test user. Find the target audience menu on the left, click to enter, find the "+ Add Users" button below test users, click and enter your Google account email address, click Add, and publish after adding
- At this point, the process is complete. Fill the previously obtained ID and secret directly into the third-party API tool, then click "Get Refresh Token" with "Do not use online address" selected, and then fill in the ID, secret, and refresh token sequentially in Cloudpaste's storage configuration
1.5 Get Refresh Token
Using Third-party Tools
You can use third-party tools such as Google Drive Token Retrieval Tool to simplify the process.
1.6 Another Authentication Method
- No ID and secret required. In the third-party API tool, check "Use online address" and click "Get directly" to obtain the refresh token
- Fill the refresh token into Cloudpaste's storage configuration, enable the "online address" checkbox, and also fill in the online API address
- At this point, only the "online API address" and refresh token are needed in the configuration to complete the setup.
2. Create Google Drive Storage Configuration
- Log in to CloudPaste admin panel → Storage Configuration
- Click "Create Storage Configuration"
- Select Google Drive from the "Storage Type" dropdown
- Fill in configuration information (see below)
- After saving, create a mount point for this storage in "Mount Management"
3. Field Descriptions
3.1 Basic Information
Configuration Name Any recognizable name, e.g., "Personal Google Drive", "Team Shared Drive"
Storage Capacity Limit (Optional)
- Only affects CloudPaste's own quota calculation
- Triggers CloudPaste's quota warning when exceeded
3.2 Authentication Configuration
These fields determine how CloudPaste connects to your Google Drive
Client ID (client_id) Required
- Google Cloud OAuth client ID
- Example:
123456789012-xxxxxxxxxxxxxxxxxxxx.apps.googleusercontent.com
Client Secret (client_secret) Required
- Google Cloud OAuth client secret
- Encrypted and stored in backend
- Leave empty when editing to keep existing value
Refresh Token (refresh_token) Required
- OAuth 2.0 refresh token
- Used to automatically obtain and refresh access tokens
- Encrypted and stored in backend
3.3 Advanced Configuration
Root ID (root_id) (Optional)
- Specify the starting directory ID in Google Drive
- Leave empty to default to
root(user's Drive root) - For Shared Drives: Enter the Shared Drive ID
- Example:
0B1234567890abcdefghij
Enable Disk Usage Statistics (enable_disk_usage) (Optional)
- When enabled, view quota usage in storage details
- Uses Google Drive's
about.getAPI to fetch storage quota
Enable "Shared with me" View (enable_shared_view) (Optional, enabled by default)
- When enabled, a virtual directory
__shared_with_me__appears under the mount root - Browse files shared with you by other users
- Note: This directory is read-only
- When enabled, a virtual directory
Token Refresh Endpoint (api_address) (Optional)
- Custom URL for token refresh service
- If not set, uses Google's official OAuth endpoint
- Use case: Third-party token management services
Use Online API (use_online_api) (Optional)
- When enabled, uses Online API protocol to call token refresh endpoint
- Only effective when
api_addressis configured
4. Special Features
4.1 "Shared with me" Virtual View
When enable_shared_view is enabled, a virtual directory named __shared_with_me__ appears under the mount root:
- Purpose: Browse files and folders shared with you by other Google Drive users
- Characteristics:
- Read-only view, upload or modification not supported in this directory
- Files are actually stored in the sharer's Drive
- Supports download and preview of shared files
- Disable: Uncheck in storage configuration if not needed
4.2 Shared Drives Support
If you're using Google Workspace Shared Drives:
- Enter the Shared Drive ID in
root_id - Ensure the OAuth account has permission to access that Shared Drive
- All file operations will be performed in that Shared Drive
4.3 Chunked Upload
Google Drive storage supports resumable chunked upload:
- Automatically handles large file uploads
- Supports frontend direct upload mode
- Empty files (0 bytes) are created via metadata, no upload traffic consumed
5. Mount and Permission Configuration
After saving Google Drive storage configuration, create a mount point in "Mount Management":
- Go to Mount Management → Create new mount
- Select the Google Drive storage configuration
- Fill in mount path (e.g.,
/gdrive), notes, etc. - Enable as needed:
- Web Proxy: Force web scenarios to use CloudPaste proxy
- Enable Signature: Signature protection for
/api/p/ proxy endpoint - Direct Link Strategy:
native_direct/proxy/use_proxy_url
Additionally, the Allow API Key Usage (is_public) option in Google Drive storage configuration:
- When enabled, API keys can use this storage within their "mount path" scope
- Combined with API key's basic_path and mount path, precisely limit access scope
For detailed mount and permission documentation, refer to:
6. FAQ
6.1 Connection Failed / Unable to Get Access Token
Possible causes:
- Incorrect
client_idorclient_secret refresh_tokenexpired or invalid- Drive API not enabled in Google Cloud project
- OAuth consent screen not configured correctly
Solutions:
- Check Google Cloud project configuration
- Confirm Drive API is enabled
- Re-obtain refresh_token
- Check OAuth consent screen scope settings
6.2 Upload Failed or Slow Speed
Possible causes:
- High network latency
- Google Drive API throttling
- File too large
Solutions:
- Check network connection between CloudPaste and Google Drive
- Large file uploads automatically use resumable upload
- If throttled, retry later
6.3 Refresh Token Expired
Symptoms:
- "Unable to get access token" error
- Logs show "invalid_grant" error
Solutions:
- Refresh token may have expired due to long inactivity
- Re-execute authorization flow to get new refresh_token
- Update storage configuration in CloudPaste
6.4 Cannot Access Shared Drive
Possible causes:
- Incorrect
root_id - OAuth account has no permission to access the Shared Drive
Solutions:
- Confirm Shared Drive ID is correct (can be obtained from Google Drive web URL)
- Ensure authorized account is a member of the Shared Drive
- Check if OAuth scope includes
drivepermission
6.5 "Shared with me" Directory Not Showing
Possible cause:
enable_shared_viewnot enabled
Solutions:
- Edit storage configuration, check "Enable 'Shared with me' view"
- Refresh directory list after saving